Scissors Pattern Design


Finding The Scissors
The scissors design came after my Water Pistols design, so I was on the lookout for more props for children. I found these safety scissors in Wilko. Small, chunky and bright, see-through red.
Shooting The Scissors
The scissors had to look bright and see-through. Backlighting from beneath didn’t look right. So the scissors were shot with side lighting and fill-in reflector on the opposite side. My original idea was to have a design that showed the scissors in stages of opening and closing as above. So I shot all the combinations needed. Back on the computer I used a clipping path to cut out each of the seven stages from fully open to closed shown above.
Converting To Illustrator Files
I used Illustrator’s Auto Trace to convert the seven photographs into just six colours each. I then converted the six colours to different opacities of the same hue. It was then possible to use the same image using different colours beneath to colour the scissors.
Simplifying The Design
I spent at least a day trying different combinations of the scissors opening, but none of them looked as exciting as simply open and closed. Inverting the closed scissors helped with the pattern. The angle of the open scissors was used as a guide so that the crosses of the open scissors looked rather like buttoned fabric.
Colour Combinations
There are now 67 colours in my swatch library. I worked through each of the colours for the scissors combined with each of the backgrounds, totalling an amazing 4489 combinations. Less the 67 where the colour of the scissors matches the background colour = 4422. The original scissors have a blue spot covering the hinge, so I also altered this too where it added more interest.
Coding The Files
To be able to go back to Illustrator and recreate all the images it is important to code them in a way that can be reproduced. Here my designs are all taken from design F. The first code relates to the colour of the dot on the hinge, then the colour used for the scissors and finally the colour of the background. So for instance F-110-100-101 means the dot is colour 110 – bright cyan blue. The 100 refers to the scissors – this is white. Then 101 for the background which is black. Rolling your mouse over the image should display its code.
Most Successful Colours
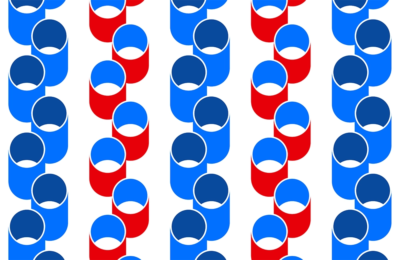
Perhaps the most appealing designs are the very simplest colour combinations. With all white scissors on a coloured background. By varying the scissors’ transparencies of white, makes the scissors much more transparent, taking on only the colour of the background. Look out for designs coded like this; E 110 x 110.
Colouring The Hinge
Having a separate layer for the two hinges meant it was possible to change their colour. In the end I felt it looked a bit cheap so have only used it for one version with red hinges on bright cyan blue background. For some of the other variations the hinge is a slightly different colour which I think is more subtle.
Creating This Page
With so many colour combinations it would be impractical to show all of them. Here I have chosen a selection of combinations that I feel are interesting. Smaller screen sizes are designed to display less colour variations.